Google Analytics Account Structure – the Ultimate Guide

Google Analytics is the most popular online tool used to analyze statistics of websites, mobile apps and devices. It doesn’t really matter whether you’ve already encountered this tool or whether you’re just beginning your analytical adventure. It’s worth taking a closer look at its account structure. Thanks to it, benefiting from the possibilities offered by Google Analytics will be much easier and safer.
Running your own company website, online store or blog requires constant analysis. This allows you to estimate how many people visit your page and what attracts their attention. You can learn more about your recipients and you obtain valuable data that makes it possible to tailor your product range or content to the users’ expectations. All of these with the use of Google Analytics. However, before starting your adventure with this tool, it’s worth taking a moment to get to know its structure. It’ll enable a fuller understanding of GA. This is particularly important if you plan to distribute the obtained data among your coworkers or specialists from external companies who, for example, do SEO for your page.
Google Analytics account structure
You can use Google Analytics for free. All you need is a Google account, which you probably already use to access Gmail, calendar or Google Docs. Once you log into your Google account, you can register in Google Analytics.
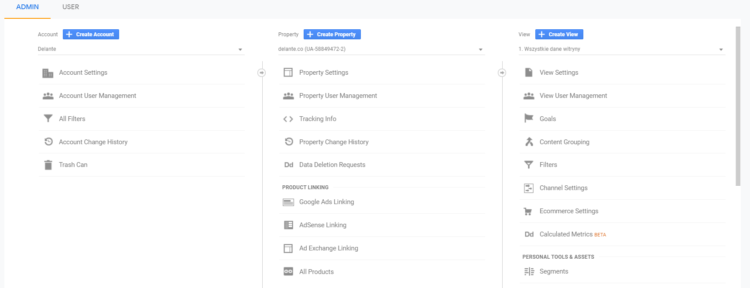
Google Analytics can be divided into three levels:
- Account
- Property
- View
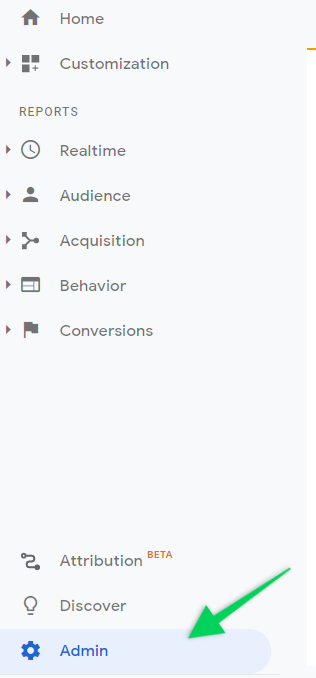
This division can be seen in the Admin section.
Account
Each Google Analytics user can access at least one account (created by him/herself personally or shared by another person) and maximally 100 accounts. Every account can comprise up to 50 services. The service is defined as every website or application you want to monitor and analyze. So if you plan to monitor three different pages, you can do it on one account and simply create a separate service for each of them. However, it’s also possible to create individual Google Analytics accounts for each of these pages. This solution is particularly useful if you want to give access to people from different companies and at the same time ensure that representatives of a given enterprise can’t access reports of another company.
Property
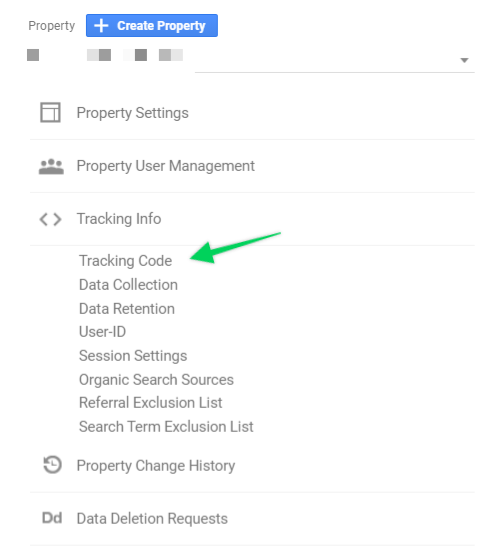
Each Google Analytics service has its own individual ID number. It’s placed in the source code of the website and with its help, it’s possible to track website traffic.
Each service can have up to 25 views. If necessary, this number can be increased, you just need to contact Google Analytics customer service.
Views
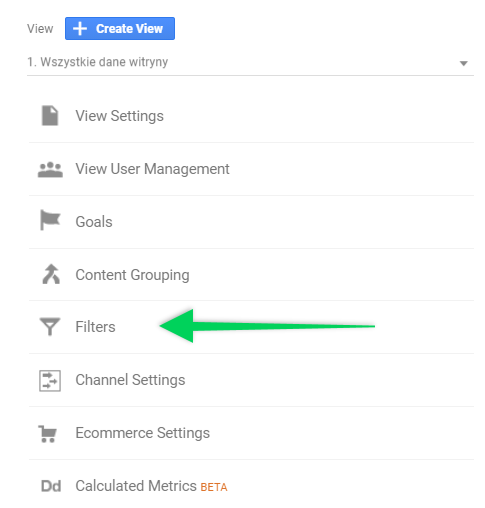
Thanks to views you can access Google Analytics reports. At this level, you can determine what kind of data should be included in your reports. Do it with the use of filters that can be created at the account level and then applied to several views. It’s also possible to develop filters at the view level. Views make it possible to take a closer look at the collected data. It’s advised to create 3 views at the very beginning to ensure safe collection of data:
- main view (with all important data)
- unfiltered view (without any filters, created in case of configuration errors)
- test view (to apply filters at the very beginning, only then you can start configuring the main view)
Creation and management of view filters
Thanks to filters you can obtain a subset of view data. Filters are used to indicate which pieces of information should be placed in a given view, you can also apply them to exclude certain data. Keep in mind that the excluded data is deleted permanently. Moreover, filters don’t retroact, meaning, they start collecting data once they’re applied.
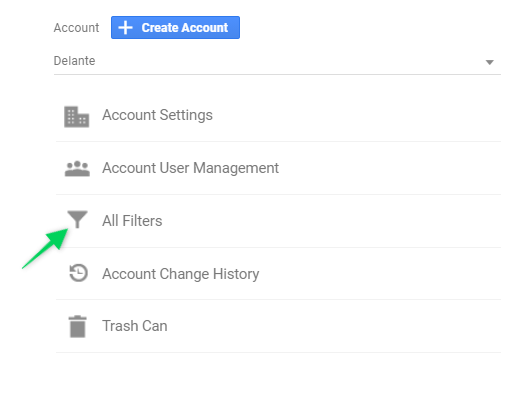
Creating filters at the account level
Filters can be created at the account level and then applied to numerous views. It’s a huge facilitator if you want to use the same filters on a few views simultaneously.
Creating filters at the view level
Filters created at the view level can be applied only on one selected view.
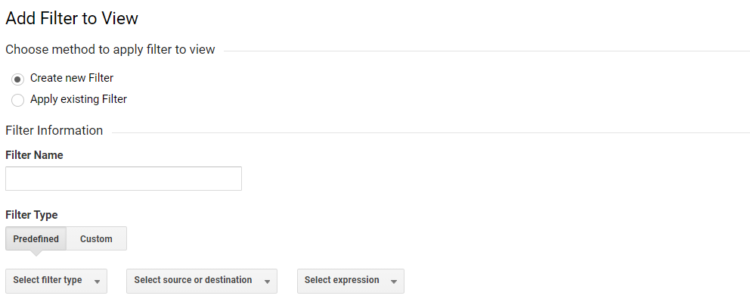
When creating filters at both view and account level, you’ll see the following window:
Next, you’ll need to provide the filter name and type. The list of predefined filters contains the most commonly applied ones. However, if you wish to create your own filter, just click the “custom” filter type.
The most popular filters that are worth applying:
- Exclude traffic from the IP addresses – excluding your own IP number allows you to collect data concerning website visitors from outside your company. Therefore, page visits and web sessions of your employees won’t be taken into account when analyzing the data.
- Exclude traffic to the hostname – excluding specific hostname data.
- Include – e.g. data from one subpage.
- Exclude the Campaign Source filter – excluding data concerning a specific, e.g. mailing, campaign.
The order of adding filters to the view is extremely important as it decides about the sequence of their implementation. So if you begin by excluding certain data, you won’t be able to include it later.
How to grant access to your Google Analytics account?
You can give access to your Google Analytics account, property, or view data to different users. In most cases, it’s essential to share such information with your coworkers or external companies responsible for advertising your brand, managing your website, or doing SEO for your enterprise. There are 4 levels of GA access:
- Manage users (this is the highest level that allows you to add or delete users and assign permissions),
- Edit (enables performing administrative functions such as adding new objectives or deleting views or services),
- Collaborate (enables displaying reports and adjusting their layout to individual needs – you can converse segments, apply filters, add annotations, and edit dashboards),
- Read and analyze (enables displaying reports and adjusting their layout to individual needs – you can converse segments and apply filters).
In case of cooperation with an external company, most people choose the “read and analyze” or “collaborate” user permissions at the view level (with the application of appropriate filters that protect data you don’t want to disclose). Thanks to it, the company gets all the necessary information and at the same time isn’t allowed to interfere with the account structure.




Really helped me to get my account set up- felt kinda lost in all those options 🙂 Thanks, Klaudia!